Dinosaur Chicken!

Who doesn’t love chicken nuggets? I’m pretty sure all kids do – and most grown ups. We’ve tried the organic frozen Applegate nuggets from the store but they don’t really taste good and are still very highly processed, I haven’t found a good organic gluten free option and I’d much rather stay away from processed foods and make my own so I can control the quality of ingredients I use. So I made my own. I make them in large batches, usually 2 or 3 pounds of chicken at a time so that I can have some for dinner and then keep the rest in the freezer. They come in really handy when you don’t have any leftovers for a preschool lunch or are in a pinch. I usually serve these with baked sweet potato fries, or green pancakes, which I also make in large batches and keep in the freezer!
I’ve made chicken nuggets a ton of different ways, I’ve used ground chicken, I’ve added apple sauce and veggies, I’ve breaded in oatmeal, gluten free crackers, organic cornmeal. This is the recipe that became a keeper and was inspired by a recipe by the Paleo Parents but it’s been modified to our tastes and we love it! I’m not sure why we named it dinosaur chicken but it just stuck.
Ingredients:
2 lbs. chicken thighs or breasts cut into 1” pieces
2 cups almond flour
2 tbsp. arrowroot flour
2 tsp. salt
3 tbsp. paprika
2 tbsp. dry mustard
1 tsp. onion powder
¼ tsp. chili powder
¾ cups olive oil
Directions:
Pre-heat oven to 400 degrees
Once you’ve cut the chicken into small pieces place them in a bowl and cover with the olive oil. Make sure to mix it all up!
In a large Ziploc bag mix together all the dry ingredients.
In small batches put the chicken pieces into the Ziploc and shake until all the pieces are well coated.
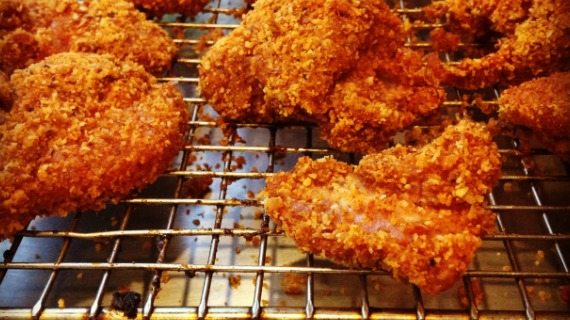
Place the pieces on a cookie sheet (If you have a cookie cooling rack place it on top of the cookie sheet and put the nuggets on top- this prevents the coating from sticking to the cookie sheet and allows it to be cooked evenly from the top and bottom)
Cook for about 15- 20 minutes, flipping halfway through and making sure they’re fully cooked before serving. If you’re using breasts check them closer to 15 minutes since you won’t want to over cook them, Thighs are a little more forgiving on cooking time since they’re higher in fat and stay moist longer.
***If you plan on freezing them go through the same steps but instead of putting then in the oven put them in the freezer on the cookie sheet (or on the cookie cooling rack if you have one). Once they’re fully frozen pull them off the cookie sheet and toss them into a freezer bag. Cook them the same way, from frozen, just add about 5-10 minutes to the cooking time.


